


How to make a 3D space exploration photo frame with a vacuum former
- Posted on
- Posted in Arts & Crafts, Home decor, Interior design
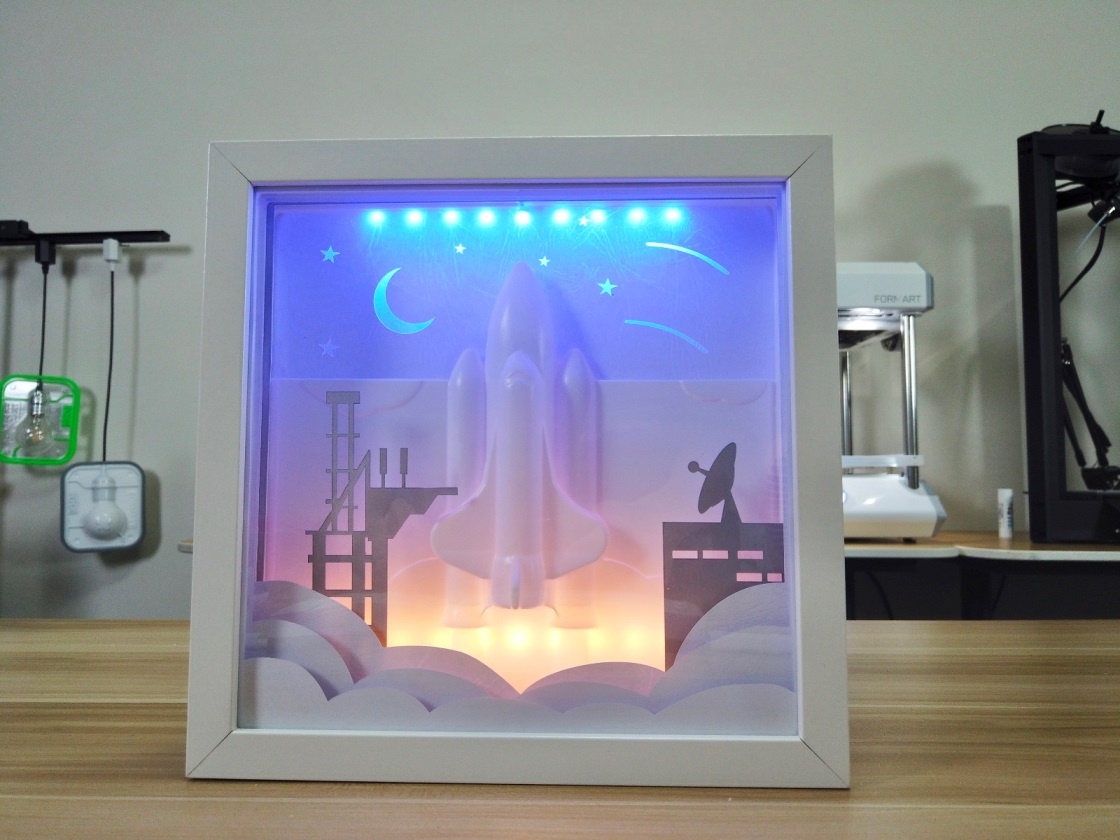
Make a 3D space exploration photo frame with LED lighting using a MY YARD FORMART vacuum former, 3d printer and cutting machine.
Vacuum formers aren’t just for product design, making packaging or other professional applications. You can also use them to realise fun home decor ideas, especially if you combine them with other maker tools.
Read on to learn more about making a 3D space exploration photo frame with your vacuum former, a 3D printer and a cutting machine.
Files
Machines
- 3D printer
- Cutting machine (e.g. Cricut, Silhouette or LOKLiK)
- MY YARD vacuum former
Materials
- HIPS sheet, 0.5 mm
- IKEA RIBBA 23 x 23 cm photo frame
- LED strip
- Cloud paper
- Grey spray paint
Instructions
- Download the STL files from the link above and print them with your 3D printer. You will need to set a 1.5 mm shell with 20% infill.
- Put the mould for the space shuttle on your vacuum former and use a HIPS sheet to form the shape.
- Take the SVG files of the engine exhaust and sky graphics and use a cutting machine to cut them out of a cloudy paper sheet or parchment paper.
- Take the SVG file of the tower and launch pad and cut them out of a 0.5 mm HIPS sheet with a cutting machine.
- Paint the tower and launch pad with grey paint.
- Put the photo frame face down on your desk and start adding the various layers, front to back.
- Start with the cutouts of the smallest exhaust clouds.
- Add one set of the 3D printed spacers on top of this first layer.
- Add the next size of exhaust clouds and add another set of spacers.
- Add the largest size of exhaust clouds and add another set of spacers.
- Next, place the layer with the launch pad and control tower.
- Add another set of spacers.Place the space shuttle and add a set of spacers.
- Finally, add the sky background.
- Glue the LED strip on the back plate of the photo frame.
- Once the glue has dried, put the back plate back into the photo frame.
- While the glue is drying, you can drill four holes in the back of the frame. These will be used to screw in the locking system later.
- Screw the four locking plates onto the frame and make sure everything is tightly stuck.